|
Date Range fields
|
Enter starting and ending dates in the Date Range fields to display only events from the defined time frame.
|
| Submit button |
Click the Submit button to activate the selected list restrictions (Date Range).
|
| Raw Data and Report tabs |
- Click the Raw Data tab to display a grid that can be filtered, sorted, and grouped.
- Click the Report tab to display and print a report showing data as filtered, sorted, and grouped on the Raw Data tab.
|
|
Grid Layout Controls
|
Complete the following to save a layout:
-
Select the desired combination of filters, sorts, groupings, etc.
Note: Filters selected in the Attributes section are not included in a saved layout.
-
Enter a name for the layout in the Default Grid Layout field.
Note: Some screens allow the user to modify and save changes to the default (Default Grid Layout) layout, though most do not.
-
Click the Save button beside the field to save the current layout under the name in the field.
Select the desired layout from the Default Grid Layout drop-down to recall that layout.
Note: Select the Default Grid Layout option to recall the default layout.
|
|
|
Use these controls on the Raw Data tab as needed to modify the list.
- Enter a term (string of characters) in the Search field to display only records containing that term.
- Click the Clear Search (X) button to undo the Search field filter.
- Click the Clear All button to undo all filters.
- Click the Toggle Filters button to display filter controls at the tops of the columns. (Click again to hide the controls.)
- Click the Export to Excel (Table) button to export the data to an Excel file formatted like the Raw Data tab.
- Click the Column Chooser button to hide or display individual columns.
|
| Report controls |
Use these controls on the Report tab as needed to modify the report.
- Click the green Back and Forward arrow buttons to move through report history.
- Click the red Stop button to stop historical navigation.
- Click the green Refresh button to refresh the information on the screen.
- Click the blue First, Previous, Next, and Last buttons to move through the report's pages.
- Click the Page Setup button to modify the report's page size, orientation, margins, and source as desired for printing.
- Click the Print Preview button to display a preview of the printed report. (Click the button again to return to the original view.)
- Click the Print button to print the report.
- Click the Export button to display a drop-down menu of export options.
|


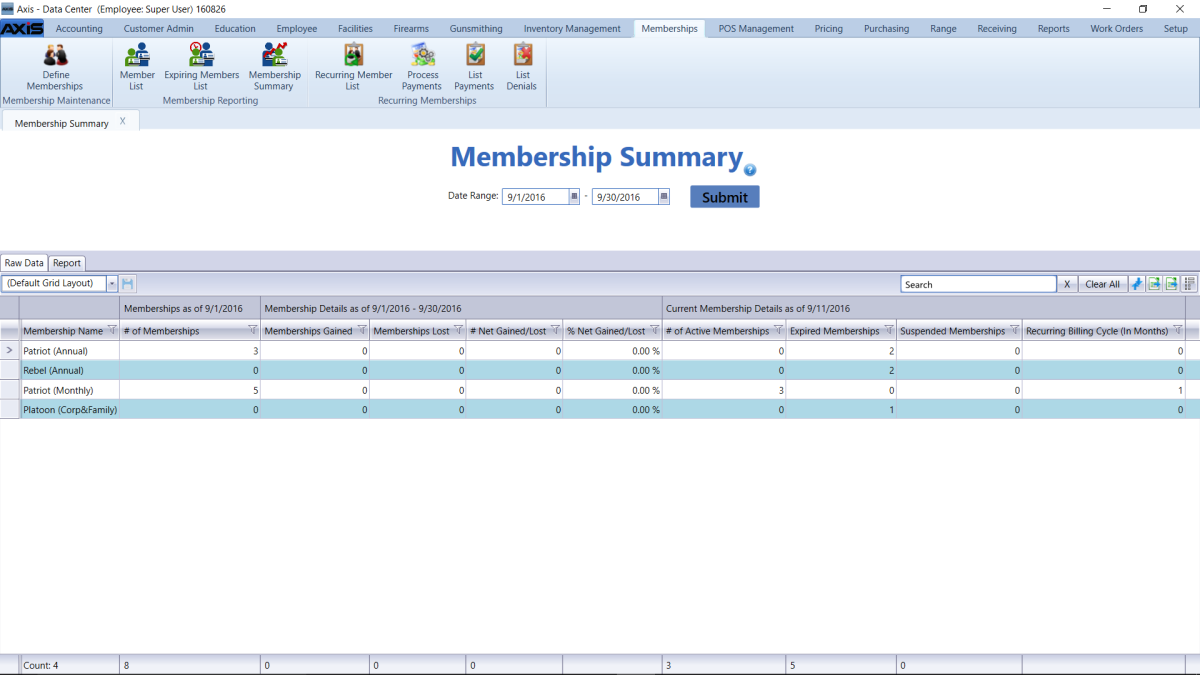
![]() Membership Summary screen.
Membership Summary screen.![]() onscreen features.
onscreen features.