![]() Navigate to the Email Templates screen.
Navigate to the Email Templates screen.
-
Log In to the Data Center Application to display the Data Center ribbon menu.

-
Select Setup > Email Templates from the main menu to display the Email Templates screen.
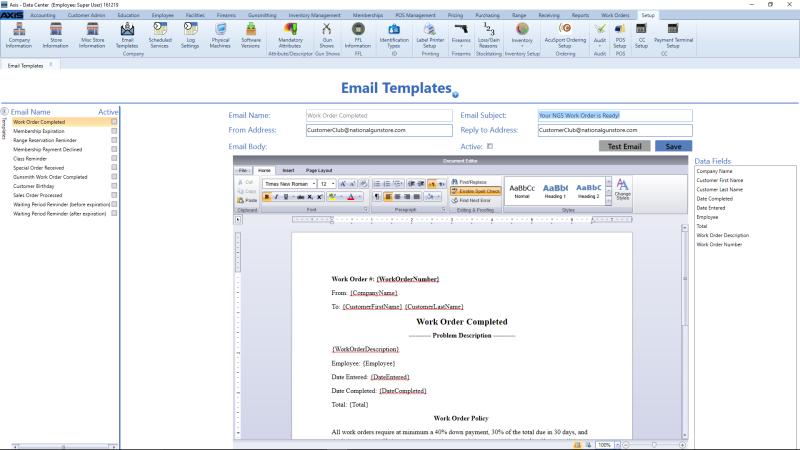
Click a template in the Email Name list to display its information in the screen's main area.
Note: If the Email Name list is not visible, click the Templates arrow button to expand it.
Complete the following if the Schedules section is present:
Note: Some templates do not require scheduling and do not include this section.
- Click the Schedules arrow button to expand or contract the section as needed.
- Click the Click here to add new item button to display a blank (0, 0, 0) time period.
- Click the time period's clock button to display slider controls.
- Adjust controls for the desired number of days, hours, and minutes.
- Click the Close button to save the time period.
- Repeat as needed to add additional time periods to the template.
Populate the Document Editor area (body of the email) with formatted text, images, etc. Complete the following to place a variable in the email body:
Note: For a sample email body that can be cut and pasted as needed, refer to AXIS Email Template: Completed Work Order.
- Position the cursor in the appropriate location.
- Double-click the desired variable in the Data Fields list to add it where indicated.
If desired, complete the following to test the email:
-
Click the Test Email button to display an address entry window.
- Enter the address to send the email to in the Test Email Address field.
- Click the Test button to send the email.
- Check the email address inbox to confirm receipt of the text email