-
 Navigate to the Invoicing screen.
-
Log In to the Data Center Application to display the Data Center ribbon menu.

-
Select Receiving > Invoicing from the main menu to display the Invoicing screen.

 Select onscreen options to determine which purchase orders are displayed on the screen:
Filter by Vendor:
Click a vendor name in the Select Vendor list to display only invoices for that vendor. (Click the All vendor name to display invoices for all vendors.)
Note: If needed, enter all or part of a vendor’s name in the field to show only matching vendors in the Select Vendor list.
- Filter by Date:
Uncheck the All Dates checkbox, enter dates in the From and To fields, and click the Refresh button to display only invoices from that date range. - Filter by PO Number:
Enter all or part of a PO number in the Search POs field and click the Search POs button to display display only invoices associated with purchase orders that contain the entered text. - .
-
Click the appropriate vendor name in the Select Vendor list to activate the Merge column.

-
Check an invoice's Merge column checkbox to include it in the merge.
Note: At least two invoices must be checked to perform a merge.
-
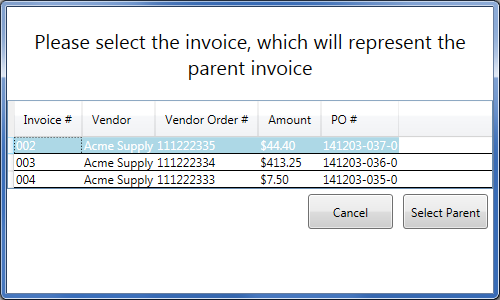
Click the Merge button (the Mergecolumn header) to display the parent invoice selection window.

-
Click an invoice to select it as the parent invoice.
Note: The parent invoice's identifying information will display on the Invoice Details screen.
- Click the Select Parent button to combine the selected invoices into a single entry on the Invoicing screen.
![]() Navigate to the Invoicing screen.
Navigate to the Invoicing screen.


