Click the Customer tab to display the Customer window.

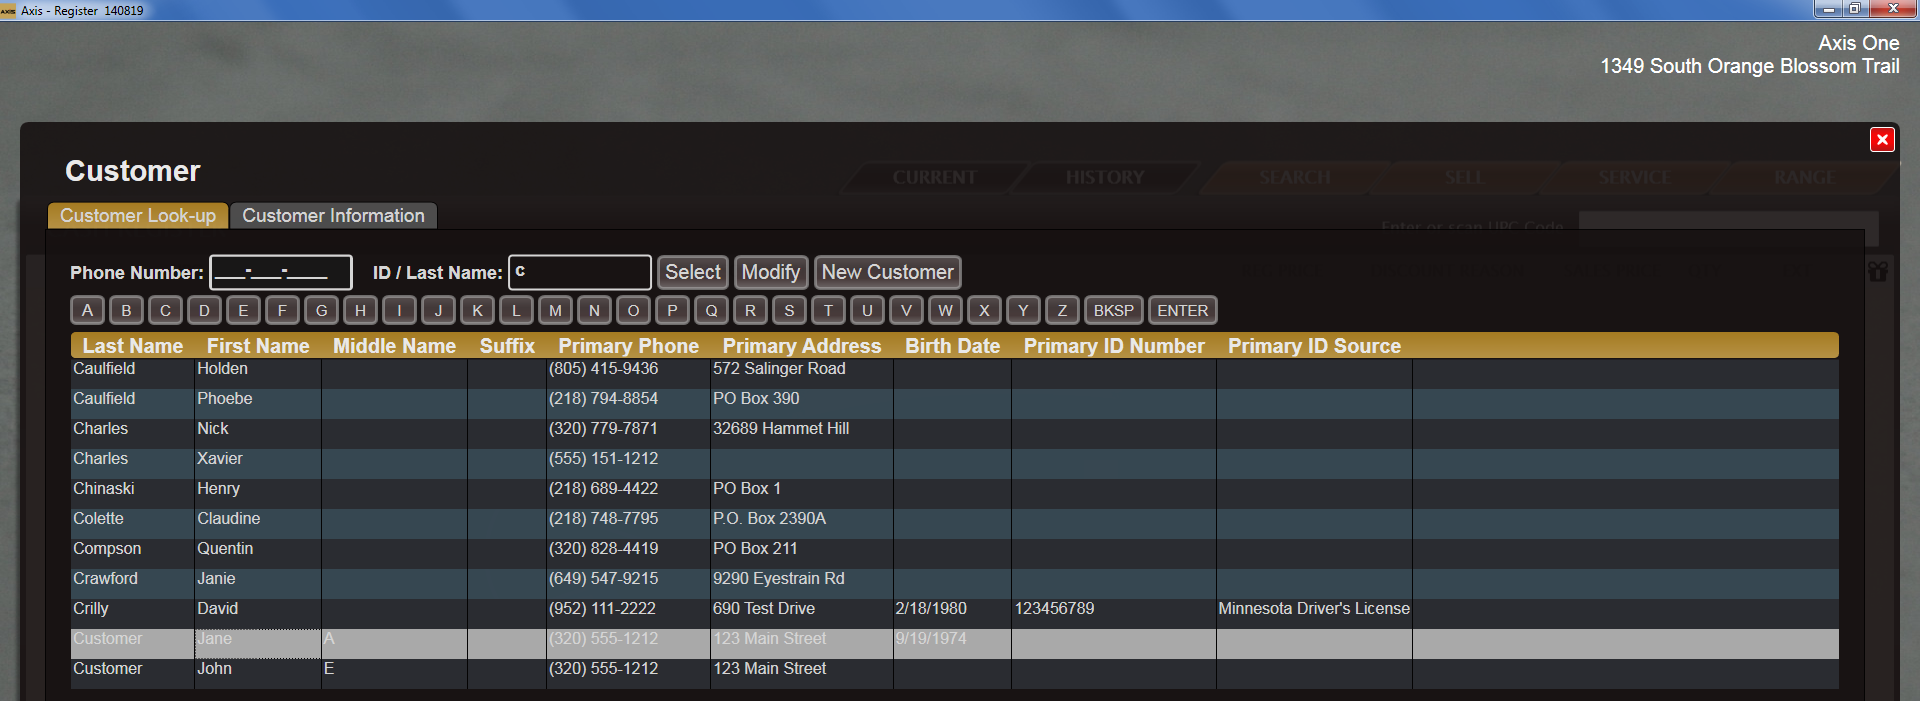
Complete the following procedures as appropriate to maintain customer records:
|
|
|
|
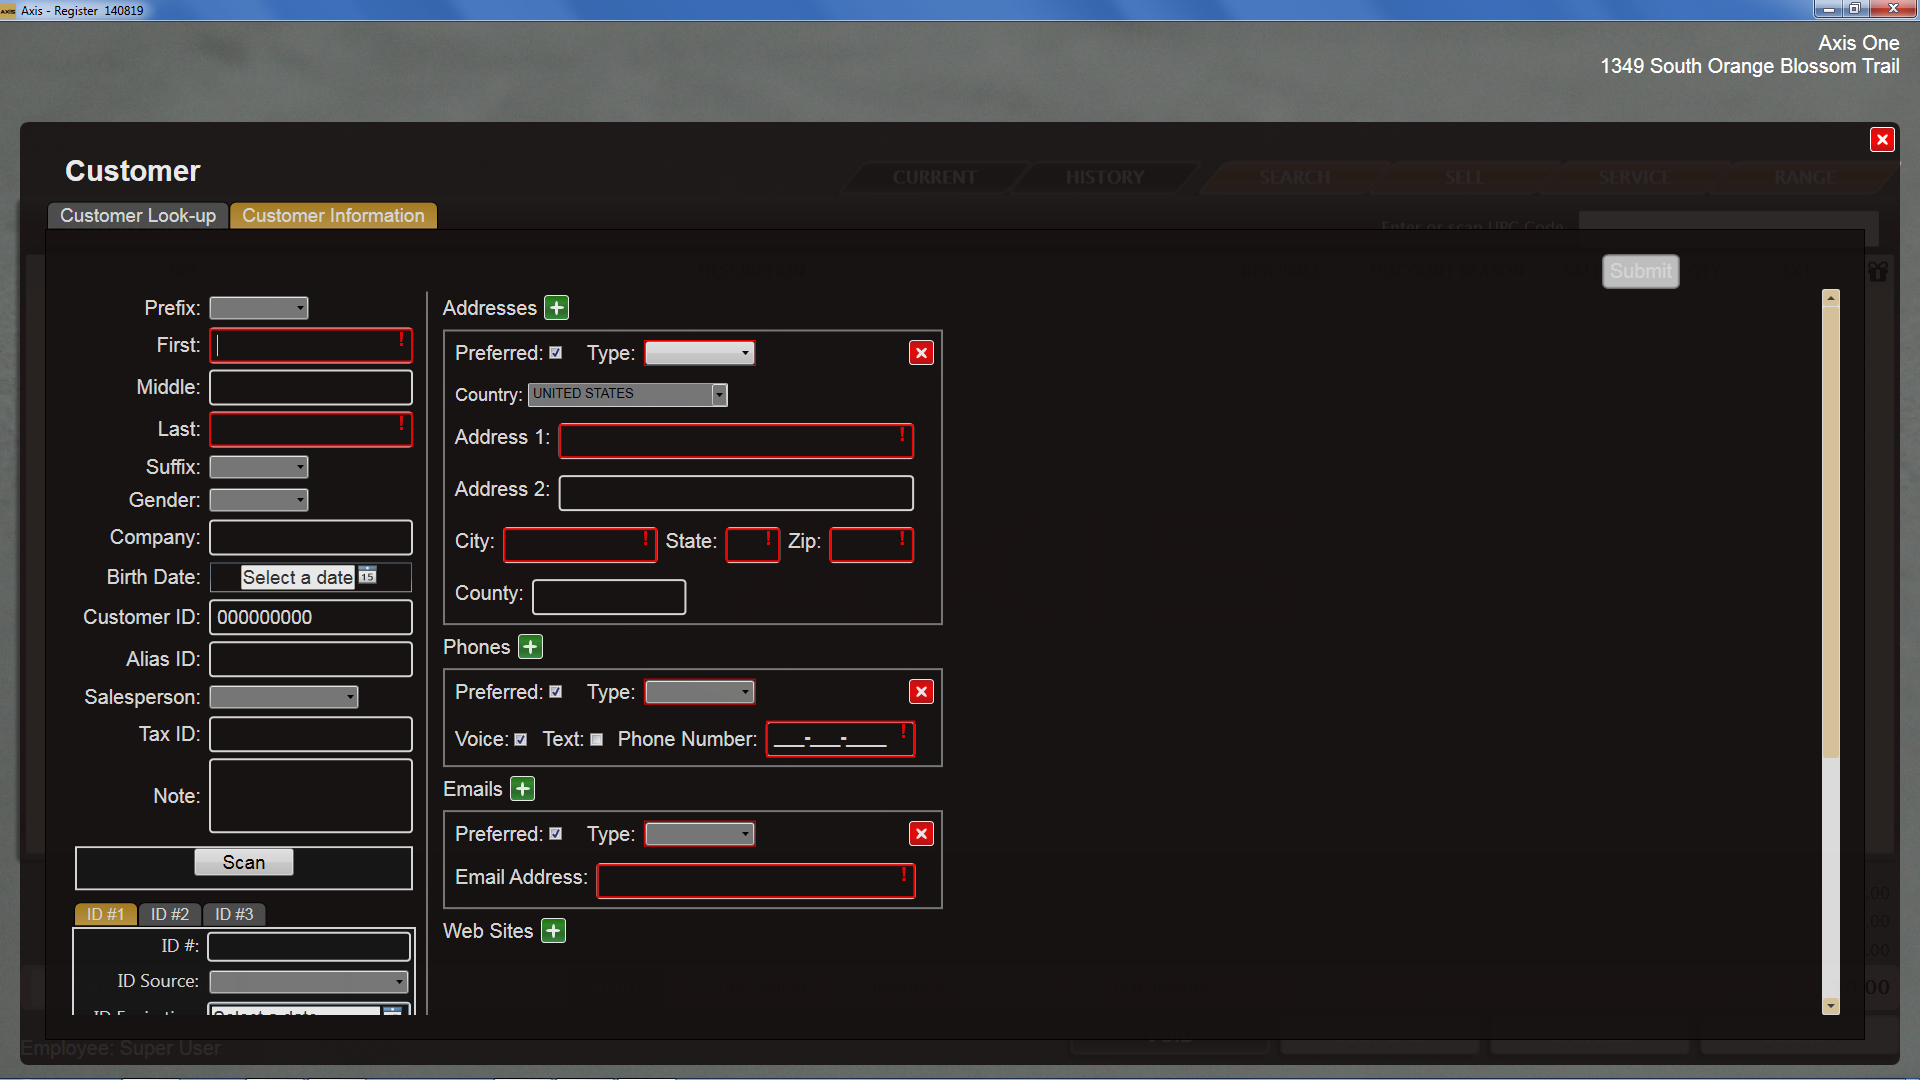
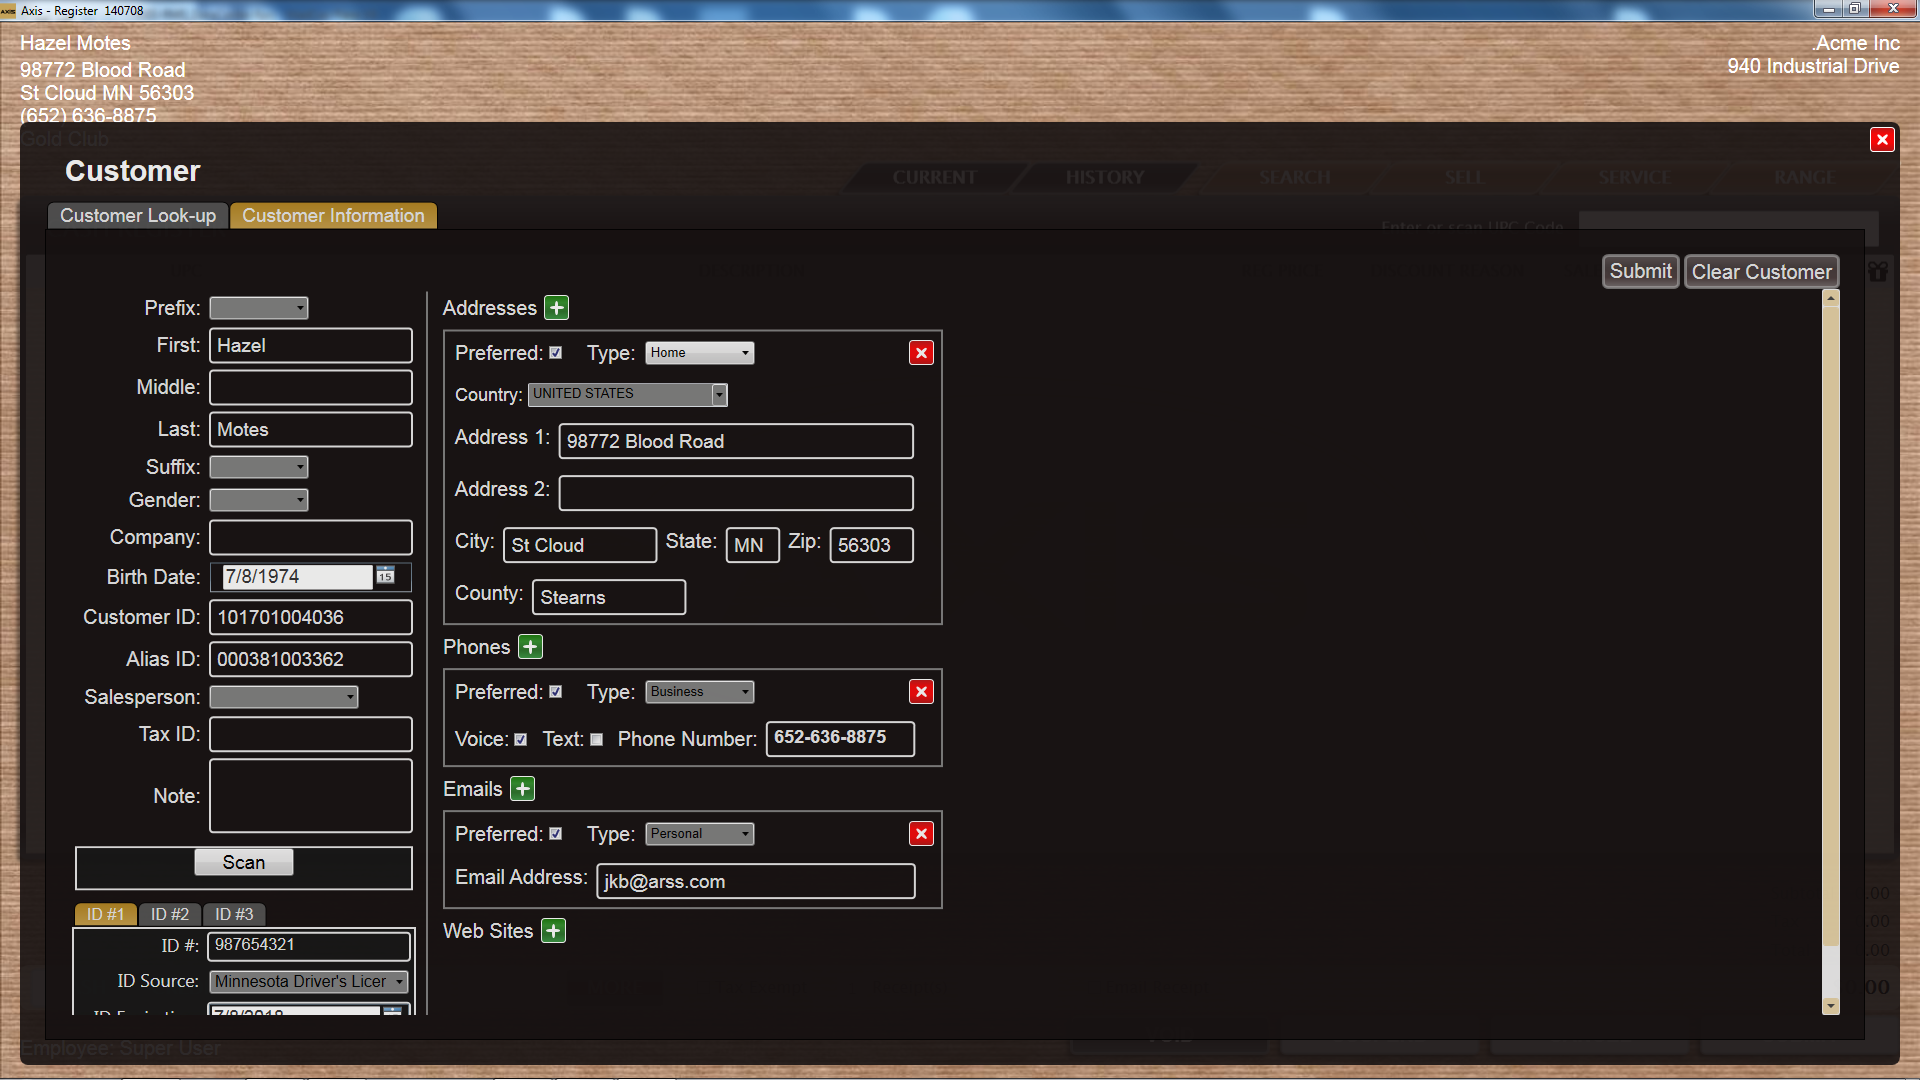
![]() Enter/edit the customer's information.
Enter/edit the customer's information.
Note: Required fields and settings are displayed with red borders. Some fields may not be present in all situations.
Note: If the customer has a government-issued ID, click the Scan button to scan it and automatically fill certain fields.
| Prefix |
Select a prefix from the drop-down menu. |
|
|
First |
Enter the customer's first name. |
|
|
Middle |
Enter the customer's middle name. |
|
|
Last |
Enter the customer's last name. |
|
|
Suffix |
Select a suffix from the drop-down menu. |
|
|
Gender |
Select a gender from the drop-down menu. |
|
|
Company |
Enter the customer's company name. |
|
|
Birth Date |
Enter the customer's birth date (mm/dd/yyyy) or Select a Date with the calendar button. |
|
|
Customer ID |
The system automatically generates a unique number and assigns it to the customer. |
|
|
Alias ID |
Enter a unique retailer-generated number per store policy. |
|
|
Salesperson |
Select the appropriate salesperson from the drop-down menu. |
|
|
Tax ID |
Enter the customer's unique, government-issued number to designate tax-exempt status for the customer. |
|
|
ID #1; ID #2; ID #3 |
Enter up to three unique ID records. Click a tab to display the fields for that record. |
|
|
ID # |
Enter the ID number. | |
|
ID Source |
Select the ID source from the drop-down menu. | |
|
ID Expiration |
Enter the ID expiration date (mm/dd/yyyy) or Select a Date with the calendar button. |
|
|
FFL |
Enter the customer's FFL number. |
|
|
Note |
Enter a brief explanatory note about the customer to be displayed at the Register. |
|
|
Scan |
Click the button to scan the customer’s government-issued ID and automatically fill certain fields. | |
|
Addresses |
If an address record is not needed, click its Close (red X) button to close it. |
|
|
Preferred |
If this address record is the preferred method of contact, check the checkbox. |
|
|
Type |
Select the appropriate value from the drop-down menu. |
|
| Country | Select the country from the drop-down menu. | |
|
Address 1 |
Enter the first line of the street address. |
|
|
Address 2 |
Enter the second line of the street address (if applicable). | |
|
City |
Enter the city. |
|
|
State |
Enter the two-letter abbreviation for the state. The field also accepts PR, GU, MP, VI, AS, AA, AE, and AP. |
|
|
Zip |
Enter the ZIP code. |
|
|
County |
Enter the county. |
|
|
Phones |
If a phone record is not needed, click its Close (red X) button to close it. |
|
|
Preferred |
If this phone record is the preferred method of contact, check the checkbox. |
|
|
Type |
Select the appropriate value from the drop-down menu. |
|
|
Voice |
If this phone number can receive voice calls, check the checkbox. |
|
|
Text |
If this phone number can receive text messages, check the checkbox. |
|
|
Phone Number |
Enter the entire (xxx-xxx-xxxx) phone number. |
|
|
Emails |
If an email record is not needed, click its Close (red X) button to close it. |
|
|
Preferred |
If this email record is the preferred method of contact, check the checkbox. |
|
|
Type |
Select the appropriate value from the drop-down menu. |
|
|
Email Address |
Enter the entire email address. |
|
|
Images |
To select an image from existing files, click the Add New Image (green +) button to locate and load the desired file. To capture a new image through an integrated webcam or with a screenshot, click the Capture New Image (blue +) button to display the Customer Snapshot window and capture the desired image. Refer to Use the Customer Snapshot window for more information. |
|
|
Preferred |
If the image is the preferred image for this customer, check the checkbox. Note: If the record displays one or more images, one image must be selected as the preferred image for the record to be saved. |
|
|
Web Sites |
If a website record is not needed, click its Close (red X) button to close it. |
|
|
Preferred |
If this website record is the preferred method of contact, check the checkbox. |
|
|
Type |
Select the appropriate value from the drop-down menu. |
|
|
URL Address |
Enter the website's URL address. |
|
When finished, click the Submit button to retain this customer record and return to the Cash Register screen.


