Access
-
Log In to the Data Center Application to display the Data Center ribbon menu.

-
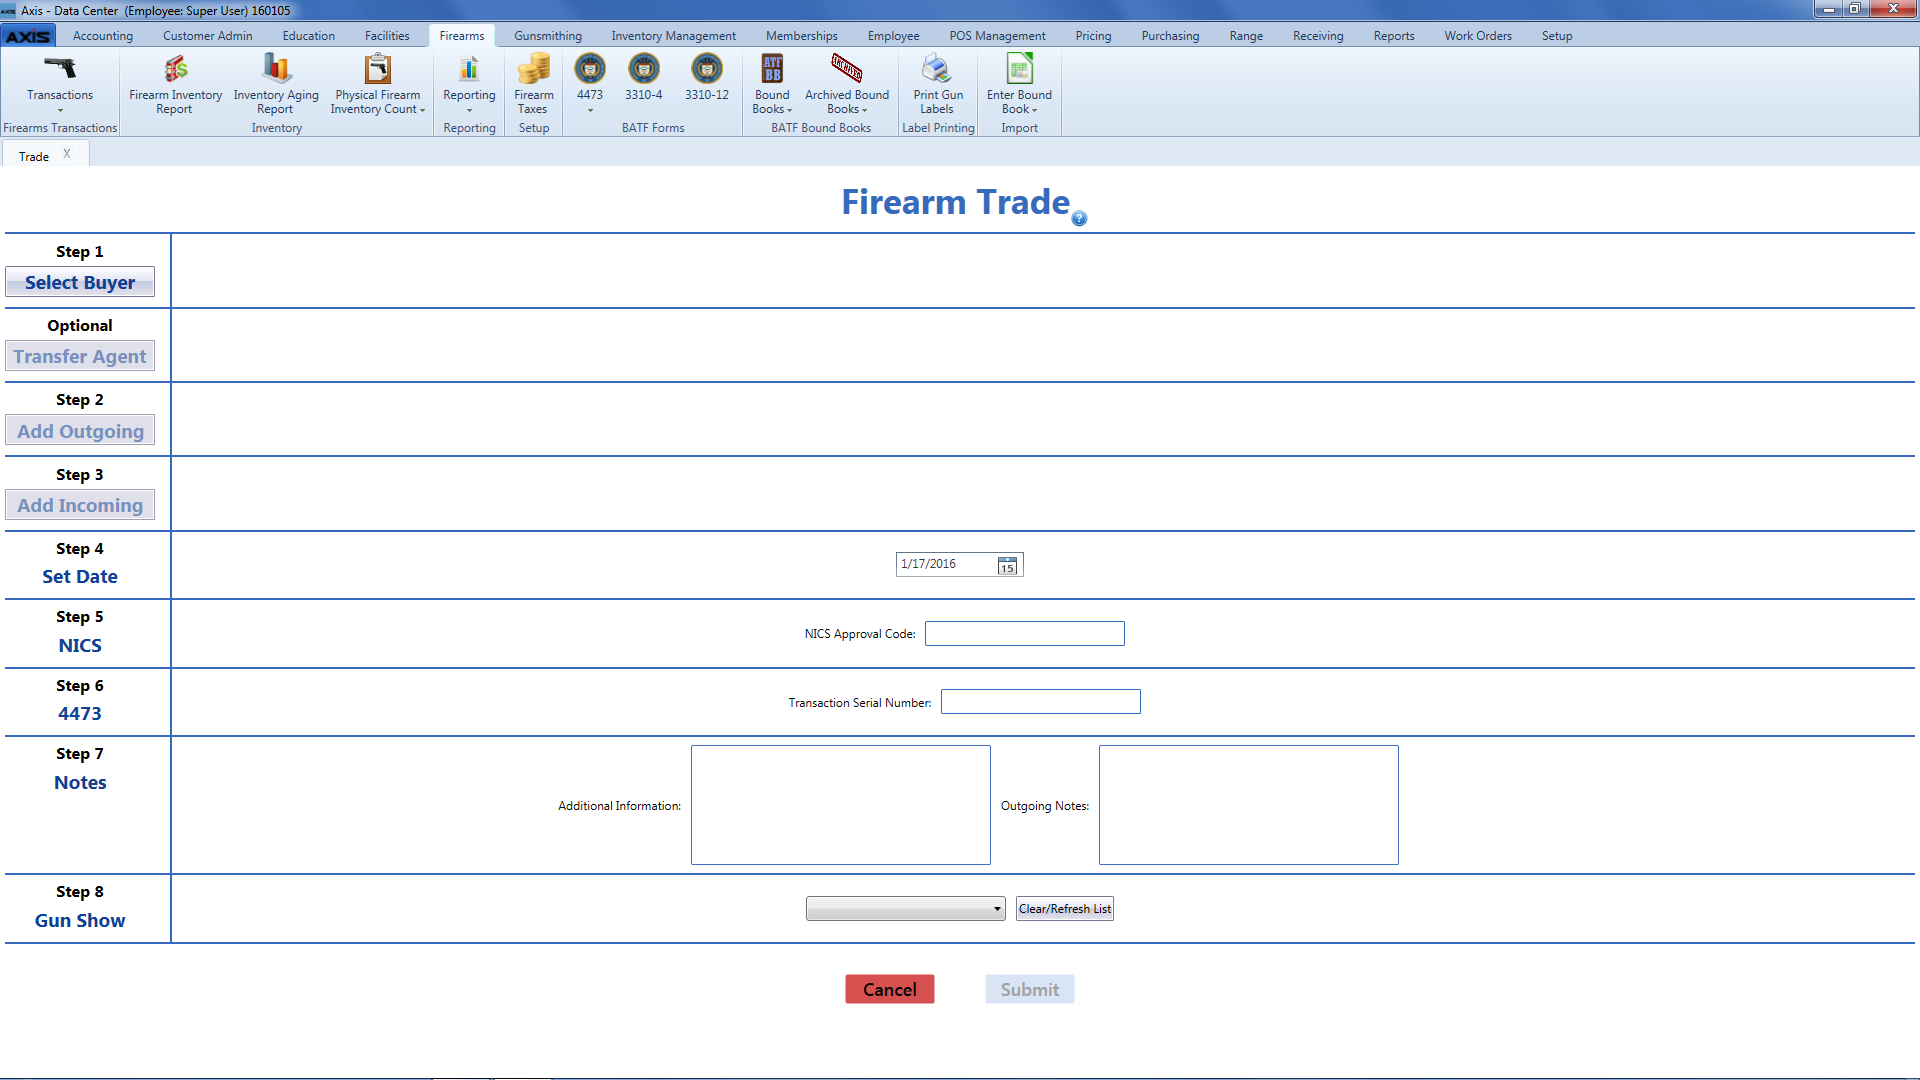
Select Firearms > Transactions > Trade from the main menu to display the Firearm Trade screen.
Procedures
Features
| Select Buyer button | Click the Select Buyer button to Select or Add a Customer. |
| Transfer Agent button | If the transaction requires a transfer agent, click the Transfer Agent button to Select a Transfer Agent. |
| Add Outgoing button | Click the Add Outgoing button to Select a Firearm from the Firearm Inventory Window and add it to the transaction. |
| Add Incoming button |
Click the Add Incoming button to Describe a Firearm and add it to the transaction. |
| Set Date field | Enter the transaction date (mm/dd/yyyy) or Select a Date with the calendar button in the Set Date field. |
| NICS Approval Code field | Enter the NICS approval code in the NICS Approval Code field. |
| Transaction Serial Number field | Enter the transaction serial number in the Transaction Serial Number field. |
| Additional Information field | Enter incoming firearm notes in the Additional Information field as needed. |
| Outgoing Notes field | Enter outgoing firearm notes in the Outgoing Notes field as needed. |
| Gun Show drop-down | If the transaction occurred at a gun show, select the gun show from the Gun Show drop-down field. |
| Submit button | Click the Submit button to send the transaction to the customer's Current record in the Register application for processing and payments. |
