Open topic with navigation
Consult with a Smartwaiver Software User
An AXIS retailer wishing to implement Smartwaiver functionality must complete the Set Up Smartwaiver Software for the Range Module procedure. The retailer's final step ("Consult with RTG Support") consists of the following procedures to be completed remotely by RTG Support during a scheduled appointment.
Create an API Key
-
Click the Export Data option in the menu on the left side of the screen to display the Export and Integrate Your Waiver Data page.
Note: If the menu is not present, click the hamburger (three bar) button in the top left corner to display it.
-
Scroll down to display the API section.
- Click the Get your API Key button to display the API Keys page.
-
Read the page.
- Enter a label (name) for the API key in the Create an API Key field.
- Click the Create button to display the Your API Keys section.
-
Note the provided API key. If desired, copy and paste (or email) it to a safe location for future use.
- Navigate to the Smartwaiver retail asset in Salesforce and paste the API key in the License Number field.
Set Up a Webhook
- Click the Manage Webhooks button on the API Keys page to display the API > Webhooks page.
- Read the screen.
-
Enter the company URL in the Your Webhook URL field.
Note: This URL is formatted as:
https://www.ars26r2.com/api/smartwaiver/[AcuSport Retailer Store Identifier]
The AcuSport Retailer Store Identifier value is a fixed-length of 8 numbers for the company number and 4 numbers for the store ID. Both should have leading zeroes. The example below represents a webhook URL for a retailer with Company 1374 (00001374) and Store ID 1 (0001) or an AcuSport Retailer Store Identifier value of 000013740001.
https://www.ars26r2.com/api/smartwaiver/000013740001
-
Select the desired option from the Participants are required... drop-down.
Note: It may be preferable to select the Do not wait... option.
-
Click the Update button.
Note: RTG recommends the user does not enable email verification when setting up his/her smartwaiver.
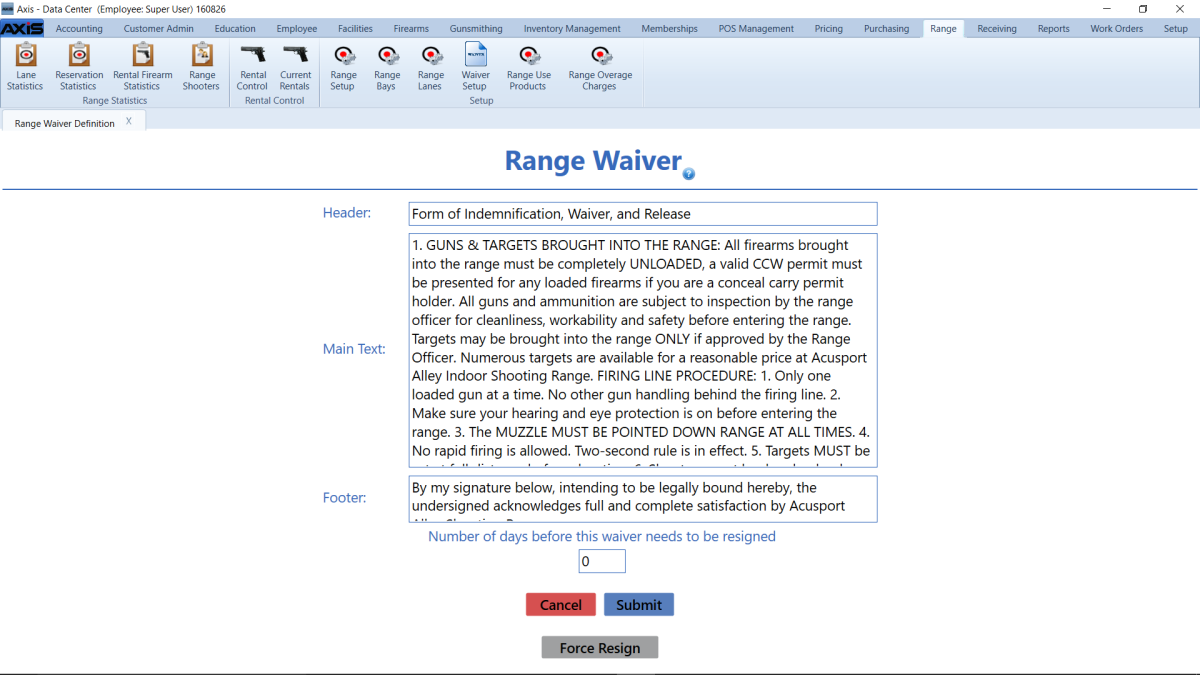
Verify Waiver Expiration Days
-
 Navigate to the store's Range Waiver screen.
-
to display the .
-

Select Range > Waiver Setup from the ribbon menu to display the .
-
Ensure the value in the Number of days before this waiver needs to be resigned field is greater than one.
Note: RTG encourages Smartwaiver users to set this to a value of 1 or more. (A value of zero causes a Smartwaiver waiver to expire immediately.) Confirm the number of days meets the retailer's expectations.
- Click the Submit button to display an update confirmation window.
- Click the OK button to close the confirmation window.
Activate the Smartwaiver Feature in the AXIS System
Note: If desired, navigate to a Party Control window to display the absence of an S (Smartwaiver Waiver) button before completing this procedure.
-
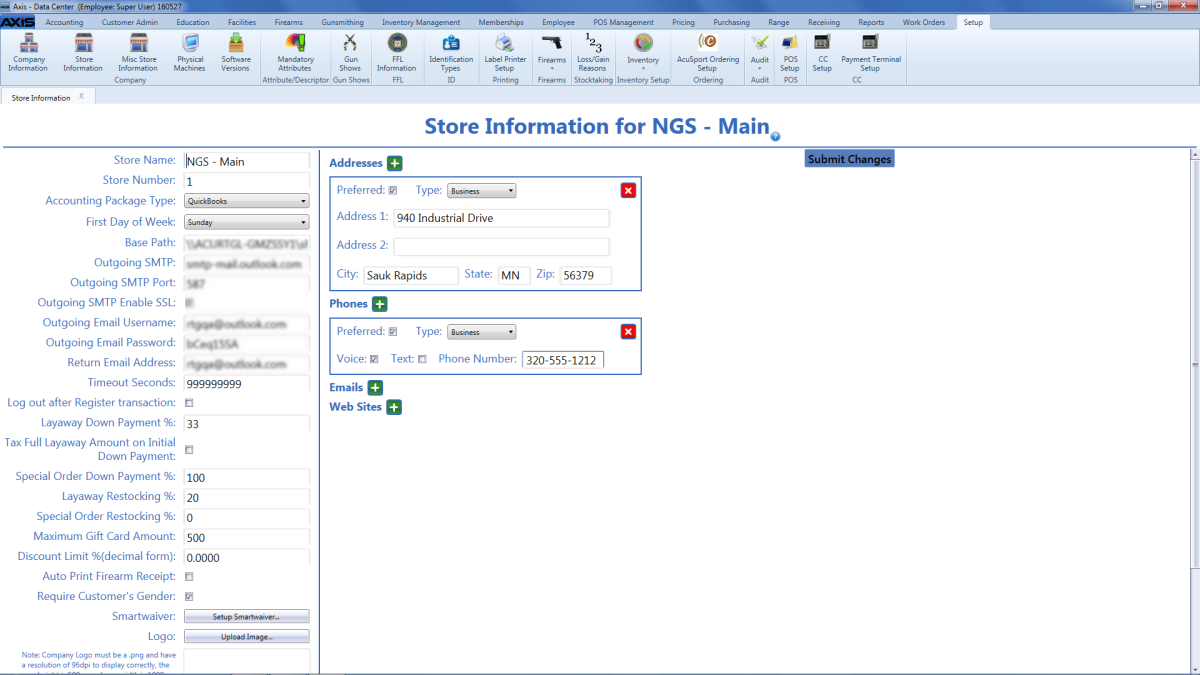
Navigate to a store's Store Information for (store) screen.
-
to display the .
-

Select Setup > Store Information from the ribbon menu to display the .
-
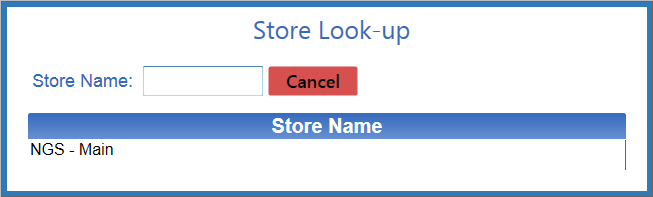
Select (double-click) the desired store in the Store Look-up window to close the window.
Note: Enter all or part of a store’s name in the Store Name field to filter the list as needed.
-
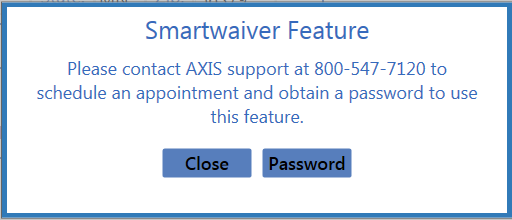
Click the Setup Smartwaiver button to display the Smartwaiver Feature window.
-
Click the Password button to display a new Smartwaiver Feature window.

Note:
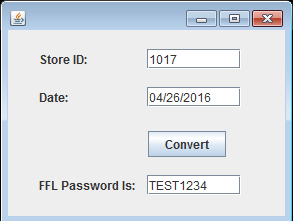
Before proceeding to the next step, use the FFL Password.jar application to generate a password.
-
Enter the Smartwaiver Feature password in the field.
- Click the Submit button to open the Smartwaiver Setup window.
-
Enter the API key created earlier in the API Key field.
-
Enter the API version number in the API Version field.
-
If desired, click the Test Communications button to test communications.
Note: You should get one of the following messages:
- Test Successful
- Test Not Successful Invalid API Key
- Test Not Successful One or more errors occurred. (Most likely due to an invalid API Version)
- Test Not Successful Data at the root level is invalid. Line 1, position 1. (Most likely due to an empty API Version and/or Key)
- Click the Submit button to close the window.
When the Smartwaiver feature has been activated, the Party Control window displays an S button in the waiver section. Refer to Verify a Shooter’s Range Waiver for more information.
Update the Salesforce Record
- Navigate to the Smartwaiver retail asset in Salesforce and paste the API key in the License Number field.
- Click the Edit button near the top of the screen.
- Enter the date Smartwaiver was installed for the retailer in the Install Date field.
- Check the RTG Retailer AssetActive checkbox.
- Click the Save button.
- Verify that the changes have been saved.
|

|
|
|
© 2016 AcuSport Corporation
All rights reserved
|